

Your Blog's Main Arsenal : Hashnode's Blog Dashboard


The previous article in this series has already said enough about why a completed blog profile is important to the future success of your blog. If you have not seen that article yet, I would strongly recommend reading it first as this article is kind of the continuity of the previous one.
To give your blog a further boost, you can consider adjusting the various settings of your Hashnode blog as per your blog brand guidelines so that your blog becomes more attractive, communicates your identity quickly, and improves the reader experience.
Let's dive in and customize Hashnode settings to get the most out of them. The settings that we will adjust will be reflected on your Hashnode blog pages including on the Blog Home page.
General Settings
This tab is all about you, your blog and how your visitors can reach out to and engage with you outside your Hashnode blog.
Step 1. Go to your Hashnode blog settings by clicking on your profile icon and then navigate to Blog Dashboard > General tab.
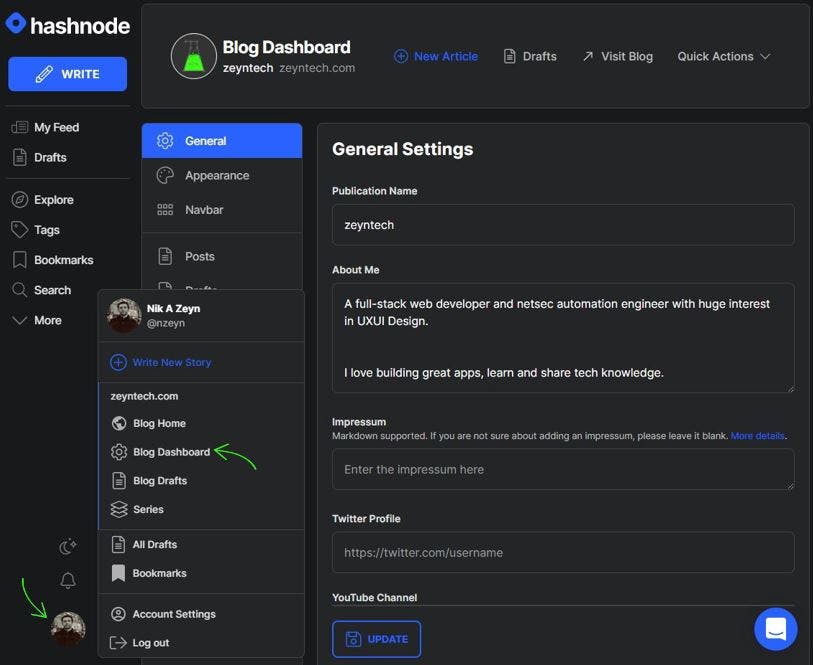
Step 2. Fill in all the fields that you would like to appear on the header section of your blog and press Update. I suggest filling in at least the publication name and about me sections. It is also good to add all of your active social links so that your visitors can easily connect and engage with you on other social platforms.
Look and Feel
What your visitors see and feel above the fold matters. The overall look and feel of your site, particularly the header section, must instantly convey the personality of your blog to your readers even before they start reading the content on it. This will help them to remember and recognize your brand across the other social platforms.
Let's give that first impression to your potential readers. The following steps assume that you already have considered and decided on color palette, images, logo, layout, and so forth.
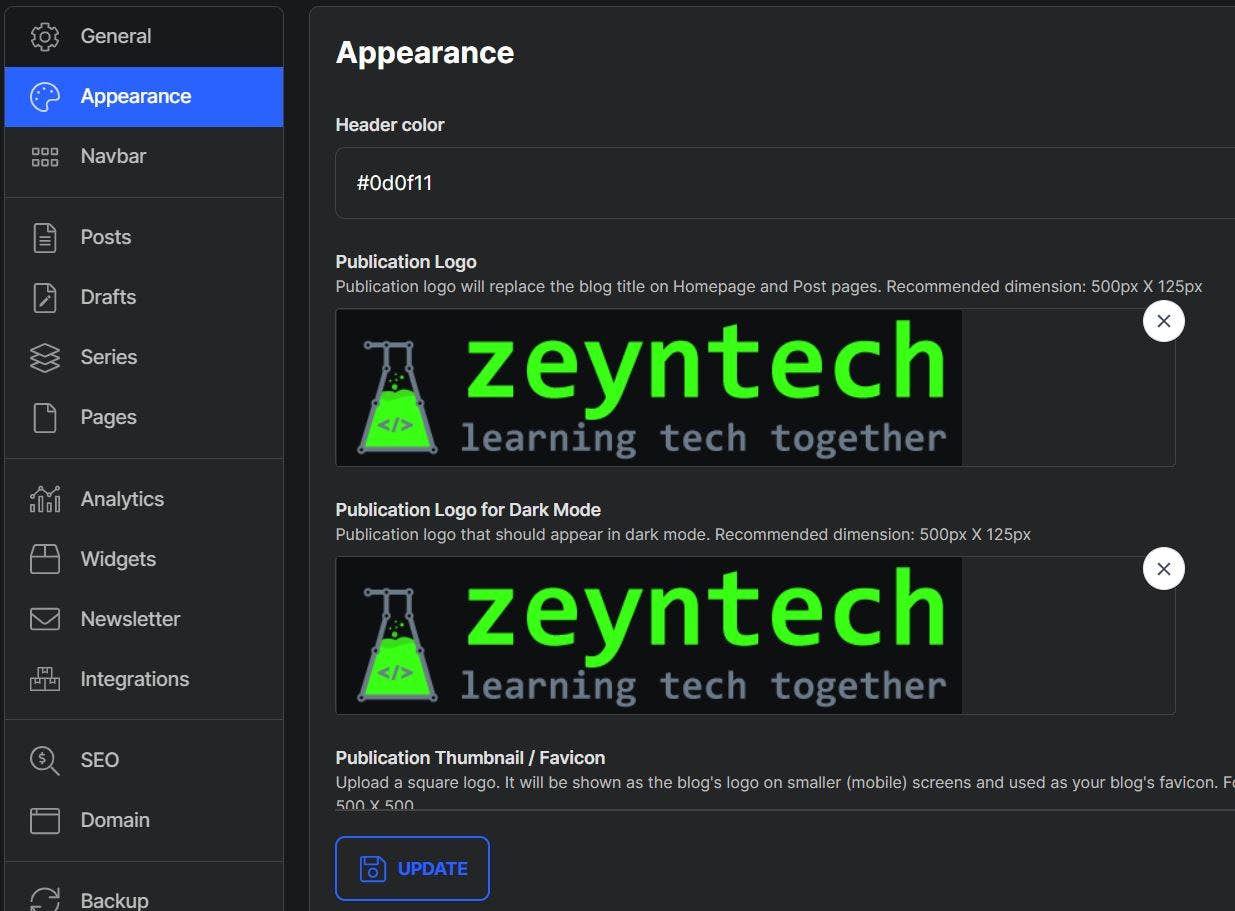
Step 1. Select the Appearance tab on your Blog Dashboard.
Step 2. Add or update your blog's appearance settings based on your brand colors.
Specify header color, favicon, logos for both light and dark modes. It is good to have transparent images so that the image background color does not spoil the view. They will be visible in the header section of your blog and you should follow the recommended dimensions.
Step 3. Choose the layout for your blog home page.
At the time of writing this article, Hashnode gives us 3 layout options for the home page. After some research and testing, I decided to go with the Grid Layout and here is why:
- Grid Layout are similar to Card Layout and according to my research the card layouts are performing better for blogs
- As I don't always use the cover images, Stacked Layout and Magazine Layout look a bit strange or half-baked in the UI for my articles. If you are planning to always include a cover image, I would suggest considering testing with the Magazine Layout.
At the end of the day, it boils down to who your audience is and what layout they prefer. It will take some time to research and test with your audience until you find what works best for your blog and why.
I would love to learn from your findings and experience. Feel free to come back and share what worked for your blog and why.
Step 4. Dark mode.
Considering I build for a tech audience, it was a no-brainer to make the dark mode default for my blog as most tech people that I know prefer using the dark mode. Also, the dark mode helps to prolong the battery life of smartphones. However, not everyone likes the dark mode. Luckily, your Hashnode blog header section allows users to easily switch to the light mode if they want to.
It would be great if we can also specify the color of the dark theme but it does not seem like we can, yet.
Step 5. Article read time and view count.
Hashnode allows us to display the article view count on the homepage. I am not sure how useful it is for me at this stage as my blog is very new and it is really taking its baby steps. As a new blogger, I don't feel I am ready to enable the article view count yet. Thus, I don't expect a high number of views to display and attract more readers. I'll enable it once my blog gets a bit more traction and has a bit higher view counts.
Anyway, I preferred not to display it for now but you need to do your own research and decide what would be more suitable in your scenario.
I would love to know what your findings are. Feel free to share in the comments section below.
The other very useful feature is the article read time and I left it on because I believe this is a useful feature for the majority of visitors based on my own experience and findings.
Step 6. Press the Update button for the changes to be saved.
Better/Easier Navigation, Better Experience
Your readers can land any of your blog pages and you have no control over it. However, once they land your site, you can guide and encourage them to stay, consume more of your content, connect and engage with you and your brand on your Hashnode blog or other platforms by providing organized and easy-to-follow navigation. Simple, organized and transparent navigation will also improve the overall user experience, help with distinguishing your brand and lead to increased brand loyalty.
You don't want to leave it to your visitors to figure out how to access other pieces of your content, or where and how to connect and engage with you and your brand. You need to lay out a clear road map to direct your visitors to various pages or information on your blog site or outside at the other platforms such as on social media, other blogging platforms or on your portfolio site.
If your viewers are unable to move around and explore to find all of the important information they are searching for, they can just leave. Ensure that your visitors are able to locate the necessary information about you, your brand and content quickly and with no hassle.
I hope that I could convince or at least get you interested in doing your own further research about the importance and the role of your blog's navigation system in keeping your visitors and readers happy and coming back for more content. With this in mind, let's explore Hashnode Navbar, Pages and Series features have to offer us.
Navbar and Pages
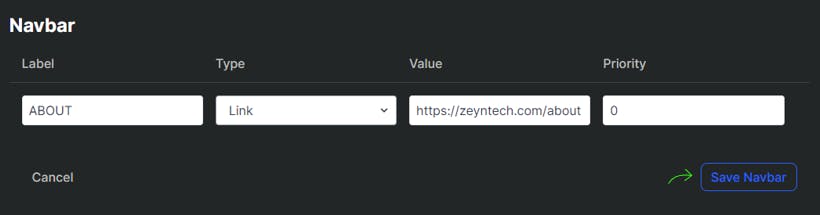
Step 1. Select the Navbar tab on your Blog Dashboard.
Step 2. Your visitors don't just consume your content. They want to know more about you and your brand. So, let's create a simple About page that will serve this purpose. Click on Add an Item button to create a link to a page. We will first create /about navigation link for our blog's About page.
So, we have seen the creation of /about navigation link but you can use the same method to create more pages as you wish. In my opinion, the following pages are important to have for tech blogs: /about, /contact, /projects or /portfolio (if applicable). I don't have all of these pages (tabs) yet in my blog site but they are in my TODO list :)
What are other pages do you think important for tech blogs to have? Comment them below.
Step 3. Click Save Navbar.
Step 4. You should now have 2 tabs in your blog page's header section:
HOME - which comes with Hashnode by default and as far as I know is always on the leftmost.
ABOUT - the one we have just created.
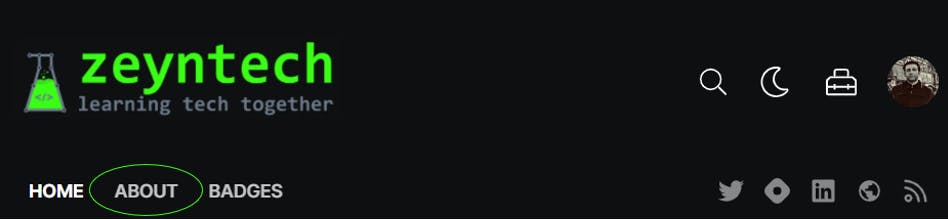
However, if you browse to your blog page and click on the ABOUT tab, it will serve you a 404 page. The reason is that although we created the navigation link pointing to our About page, the About page itself does not exist yet. In the next step, we will cover creating the About page and how to link them together.
Step 5. We now need to create the About page that will be linked to the navigation item /about that we created. To create the About page, go to your hashnode blog settings by clicking on your profile icon and then Blog Dashboard > Pages.
Step 6. Click Create new page.
Step 7. Add a title for this page: ABOUT
Step 8. Add the content for this page. The content recognizes various HTML elements. So, feel free to use what you can. You can use the Preview tab to see what the rendered view will look like.
Step 9. Add the Page Slug: about
This is the last part of the URL right after the last forward-slash ("/") from the ABOUT navigation item that you created earlier.
Step 10. Upload an image that will be shown when your website is shared on social media and other platforms. Please follow the guidelines for image type and dimensions as instructed by Hashnode.
Step 11. Enter SEO description for this page. Keep it under 160 characters as instructed by Hashnode. This is where you can relay your brand message, convey value to the visitor and make a call-to-action. Ensure your SEO description matches your content and every page on your blog has a unique description. Don't forget to include primary keywords to communicate your important message to the viewers.
Let me know what your SEO Description will look like. Take a look at my current SEO description. Tell me how I can improve it.
Step 12. Press the Update button for the changes to be saved.
Internal Links
You don’t want to make your viewers work too hard to find what they are looking for. They need easily navigate from one page to another related page without any hassle in order to find your other pieces of content. If it is not much obvious where to go next, then highly likely your visitors will lose interest in your content and will leave your blog site. Thus, you need to add internal links to other relevant articles within your content so that your readers can move through your blog pages while engaging with your content.
One method is to add an internal link within an article and this can be accomplished using a simple link feature of the Hasnode Write editor bar or just simply using the markdown.

The other method is to organize the other relevant articles into a single group of articles and this would appear at the beginning or end of the article. Hashnode Blog Dashboard has a great feature for this called Series. Check this article if you would like to explore further about Series feature.
Don't lose your valuable visitors or readers. Let them know how to connect and engage with you so that you can keep them closer to you :)
This is how far I explored Hashnode's Blog Dashboard features and I can see there are some good ones that I have not started using yet. Some of the appealing ones are Analytics, SEO and Integrations.
Thanks for coming this far. This chapter wraps the initial steps that I needed to take in my blogging journey and expect more as I move further along. If you don't want to miss my upcoming posts about my tech blog journey, you can subscribe to be notified or connect with me on Twitter or Linkedin.